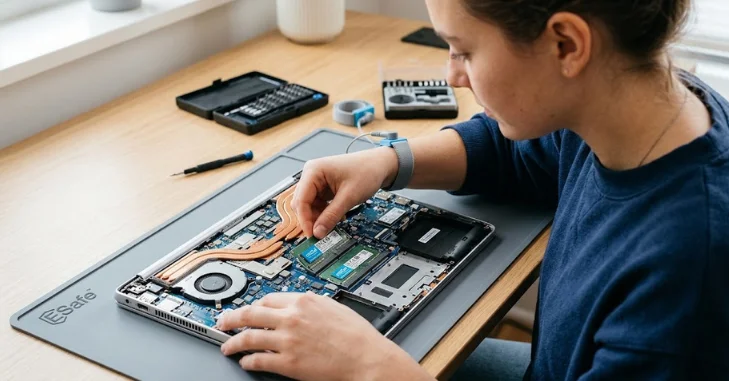
Adding RAM is one of the simpler laptop upgrades, but compatibility matters more than the physical installation. Before opening the case, confirm that your exact model has replaceable memory and supports the module you plan to install.
| Check | What you need to know |
|---|---|
| Upgradeability | Confirm that the laptop has a replaceable memory slot rather than fully soldered RAM |
| Memory type | Match the supported DDR generation and module format |
| Capacity | Check the maximum supported RAM capacity and the number of available slots |
| Safety | Shut down the laptop, disconnect external power, and take precautions against static electricity |
| Installation | Align the notch, seat the module correctly, and secure the retaining clips |
| Verification | Confirm the new memory capacity after Windows starts |
Quick answer: If you’re learning how to install memory in laptop PCs, start by checking your model’s memory specifications. Shut down the machine and disconnect the power. Open it according to the manufacturer’s service instructions, securely seat the compatible module, close the laptop, and then confirm the new memory capacity after startup. Manufacturer instructions should always take priority for model-specific details.
Key takeaway: Don’t buy RAM based only on its capacity or advertised speed. Check the laptop model, supported memory generation, maximum capacity, slot configuration, and module format first. Some systems have removable SO-DIMMs, while others combine soldered memory with a single upgrade slot.
Check RAM Compatibility Before Opening the Laptop

The safest upgrade starts with your laptop’s exact model number. Search the manufacturer’s support page or service manual to find its memory specifications. Dell, for example, directs owners to model-specific documentation before installing new memory.
Check four things before buying a module: DDR generation, supported capacity, slot count, and physical format. A DDR4 module cannot simply replace a DDR5 module, even though both are designed for laptop computers.
Most upgradeable laptops use SO-DIMM modules, but that isn’t universal. Some thin laptops have soldered memory, while others combine onboard RAM with one SO-DIMM slot. Newer machines may also use CAMM2 or LPCAMM2 designs, which require different replacement procedures.
Windows Task Manager can help you inspect the current memory setup. Open Task Manager > Performance > Memory to review the installed RAM and, on supported systems, the number of memory slots in use. Lenovo also documents this method for checking memory information.
If you’re choosing a laptop because you expect to upgrade it in the future, Techriyon’s workstation laptop guide discusses systems with higher memory capacities and upgrade options.
What You’ll Need for the Upgrade
For a typical SO-DIMM installation, prepare a precision screwdriver that matches the laptop’s screws, a compatible RAM module, and a clean work surface.
Static electricity can damage electronic components. Lenovo specifically warns about static electricity when replacing memory, so discharge any static before touching internal parts. Avoid touching the gold contacts on the memory module.
Keep your laptop’s service manual open while you work. Bottom-cover clips, hidden screws, battery connectors, and memory locations differ between models.
How to Install Memory in Laptop PCs: 7 Safe Steps
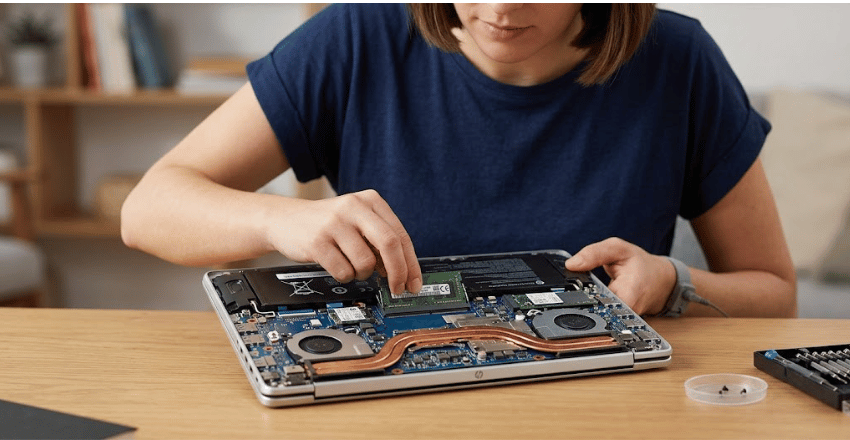
- Shut down the laptop completely. Save your work, turn off the computer, unplug the charger, and disconnect all attached devices. If your model has a removable battery, remove it as directed by the manufacturer’s manual. HP also recommends disconnecting the power before accessing the laptop’s RAM.
- Open the correct service area. Turn the laptop over on a clean surface. Remove the specified screws, then carefully release the bottom panel or dedicated RAM cover. Don’t force the plastic clips. If the panel resists, check the manual to make sure you haven’t missed a screw.
- Disconnect the internal battery if required. Some laptops use an internal battery instead of a removable one. Follow the manufacturer’s service procedure before disconnecting it. Never pull a battery connector by its wires.
- Release the existing module if you need the slot. Gently move the retaining clips away from the SO-DIMM. The module should rise at an angle. Pull it out by its edges without touching the contacts.
- Align the new module with the slot. Match the notch on the RAM module to the key on the connector. If the notch doesn’t line up, stop and recheck the module’s orientation and compatibility. Don’t rotate, bend, or force it into place.
- Seat and secure the RAM. Insert the SO-DIMM at approximately the angle specified for your model, then press it downward until the retaining clips lock into place. HP’s laptop instructions describe inserting a SO-DIMM at about a 45-degree angle before pressing it into position.
- Reassemble and start the laptop. Reconnect the internal battery if you disconnected it, replace the bottom panel, reinstall the screws, and reconnect external power. Start the laptop and allow it to complete its normal startup process.
If you notice excessive dust or signs of a cooling problem while the laptop is open, Techriyon’s guide to diagnosing a loud computer fan provides related maintenance and airflow guidance.
Verify That the New Memory Works
After Windows loads, press Ctrl + Shift + Esc, select Performance, and then open Memory. Confirm that the reported capacity matches the total amount of RAM you expected to see. Microsoft also recommends using Task Manager to monitor memory usage when diagnosing PC performance.
For an additional stability check, Windows includes Windows Memory Diagnostic. Open Run, enter mdsched, and follow the prompts. Microsoft documents this tool for checking system memory when troubleshooting Windows errors.
What to Do If the Laptop Doesn’t Boot

| Problem | First action |
| Black screen after the upgrade | Shut down the laptop and reseat the module |
| New RAM isn’t detected | Check both retaining clips and the module’s alignment |
| The wrong capacity appears | Confirm the module specifications and the laptop’s capacity limits |
| The system starts only with the old RAM | Recheck the compatibility of the new module |
| Two modules cause problems | Test one compatible module at a time |
Improper seating is a common cause of problems after a memory upgrade. HP’s installation guidance recommends checking the module’s seating, testing one module at a time, and verifying compatibility when a computer fails to boot.
Don’t keep trying to force an incompatible module into the slot. Reinstall the original memory first. If the laptop starts normally, compare the new module’s specifications with the manufacturer’s supported configurations.
For readers considering a more repairable or configurable computer in the future, Techriyon’s MacBook Pro alternatives guide includes systems for which hardware upgradeability may be an important part of the buying decision.
Make Compatibility Your First Step
Installing RAM usually takes less effort than choosing the correct module. Start with your exact laptop model and its official memory specifications. Confirm the slot type and supported capacity before ordering anything.
Once those checks are complete, follow the manufacturer’s service instructions and handle the module carefully. This approach reduces the risk of buying incompatible hardware or of having to reopen the laptop to fix a preventable installation problem.
Frequently Asked Questions
Fully soldered RAM isn’t a standard user-replaceable SO-DIMM. Some laptops combine soldered memory with an available upgrade slot, so check the exact configuration before buying anything. ASUS and Crucial documentation provide examples of systems that combine onboard memory with replaceable modules.
No. RAM is working memory, not permanent storage. Replacing a memory module doesn’t normally erase files stored on your SSD or hard drive. You should still shut down the computer properly before opening it.
Yes, if your laptop has an empty compatible slot and the new configuration remains within the system’s supported limits. If every slot is occupied, you’ll need to replace one or more existing modules.
First, check whether the module is seated correctly. Then verify the laptop’s maximum capacity, slot limits, and supported module specifications. If necessary, test the modules individually to identify a compatibility or hardware problem.