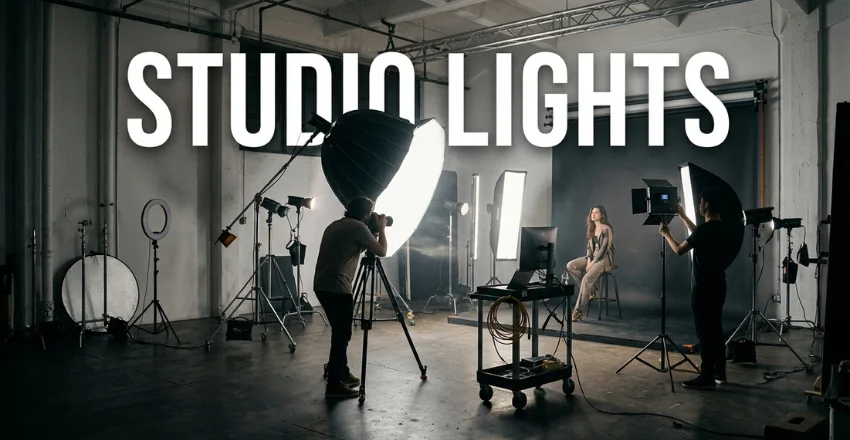
The right studio lights depend on what you shoot, your available space, and whether video matters. Continuous LEDs suit hybrid creators because you can see the lighting before recording. Strobes make more sense when still photography, motion freezing, or stronger output matters most.
Quick answer: Choose continuous LED lighting for video, streaming, interviews, and mixed photo-video work. Choose strobes or flashes for still photography requiring more output or motion control. Start with one good key light and modifier, then add fill or background lighting only when your work needs it.
| Buying decision | Practical starting point |
|---|---|
| Photo and video | Continuous LED |
| Mainly still photography | Strobe or flash |
| First modifier | Softbox or umbrella |
| Small desk setup | Compact panel or ring light |
| Portrait setup | One large, soft key light |
| Color accuracy | Check CRI and TLCI ratings |
| Flexible color | Bi-color light |
| First upgrade | Better modifier or stronger key |
| Typical starter budget | About 80–250 |
| Typical midrange budget | About 250–700 |
| Larger system budget | About 700–1,500+ |
Continuous LED vs Strobe or Flash
Continuous LEDs stay illuminated while you work. That makes positioning, shadow control, and exposure changes easier to judge visually. The same light can also serve photography, video, streaming, and conferencing.
LEDs usually deliver less photographic output than comparably priced flash equipment. Bright rooms and large modifiers can quickly expose that limitation. Video shooters still need continuous lighting because flashes cannot illuminate an entire recording.
Strobes produce a brief, powerful burst when the camera takes a photograph. That output helps freeze movement and reduces the influence of unwanted ambient lighting. Strobes can also support smaller apertures without requiring extremely high camera sensitivity.
The drawback is a less visual learning process. You normally make a test exposure before seeing the final effect. Wireless triggering and modeling lamps can make that workflow easier.
| Feature | Continuous LED | Strobe or flash |
|---|---|---|
| Video use | Excellent | Not suitable as primary video lighting |
| Easy visual setup | Excellent | Requires test exposures |
| Motion freezing | Limited by camera settings | Strong |
| Output for stills | Moderate to high | Usually higher |
| Mixed photo/video use | Excellent | Limited |
| Beginner learning curve | Easier | Moderate |
| Bright ambient conditions | Can require more power | Stronger choice |
| Heat and noise concerns | Check cooling design | Usually less relevant during exposure |
Pros of continuous LED
- You can see shadows before recording.
- One system can handle photos and video.
- Dimming makes small adjustments straightforward.
- Bi-color models can simplify mixed-light situations.
Cons of continuous LED
- High output can become expensive.
- Fans may matter during quiet video recording.
- Large modifiers reduce usable brightness.
- Compact lights may struggle across large sets.
Pros of strobe or flash
- Strong output is available for still photography.
- Short flashes can freeze movement.
- Ambient room lighting becomes easier to control.
- Strong output works well with larger modifiers.
Cons of strobe or flash
- It cannot serve as normal video lighting.
- Beginners must learn triggering and flash exposure.
- You usually need test photographs.
- Camera compatibility matters when using advanced triggering features.
Verdict: Which Type Should You Buy?
Choose continuous lighting if video represents a meaningful part of your work. It also suits beginners who want immediate visual feedback. Streaming and interview setups usually benefit from this approach.
Choose flash when still photography clearly dominates your workflow. Portrait, product, and motion work often benefit from its greater photographic output. Hybrid creators may eventually own both systems.
Godox and Neewer sell equipment across both categories. Aputure is commonly associated with continuous video lighting, while Elgato focuses heavily on creator and desktop lighting. These brands are examples, not automatic recommendations.
Softboxes vs Umbrellas
A modifier changes the apparent size and direction of your light source. Larger apparent sources generally create softer transitions between highlights and shadows. Distance from the subject also changes how soft that light appears.
A softbox encloses the light and directs most output forward. Its shape helps limit spill onto walls, backgrounds, and nearby objects. Grids can provide even tighter control when the modifier supports them.
Umbrellas spread light more broadly and usually set up faster. They are often inexpensive, light, and useful for beginners. Their wider spill can become inconvenient inside small rooms with reflective walls.
| Modifier | Main advantage | Main drawback | Good fit |
|---|---|---|---|
| Softbox | Stronger spill control | Slower setup | Portraits, products, controlled video |
| Shoot-through umbrella | Fast, soft coverage | More spill | Beginners and portraits |
| Reflective umbrella | Broad bounced light | Less directional control | Groups and simple studios |
| Ring light | Compact frontal lighting | Flat look when overused | Desk video, beauty, close framing |
For most home studios, a medium or large softbox makes a sensible first modifier. An umbrella is attractive when cost and fast setup matter more. Neither option automatically produces better photographs.
Where Ring Lights Fit
Ring lights place illumination close to the camera lens. This creates relatively even frontal lighting and distinctive circular eye reflections. They work particularly well for close framing and desk-based content.
Their main weakness is limited shaping control. Straight-on illumination can flatten facial features compared with an angled softbox. Larger scenes can also exceed their useful coverage.
A ring light can still be a practical first purchase for calls, makeup content, or compact videos. If you also record voice at a desk, our budget microphone guide covers the audio side. Creators planning interviews or cinematic scenes should consider a separate key light. That choice provides more control over direction and contrast.
How to Choose Studio Lights for Your Workflow
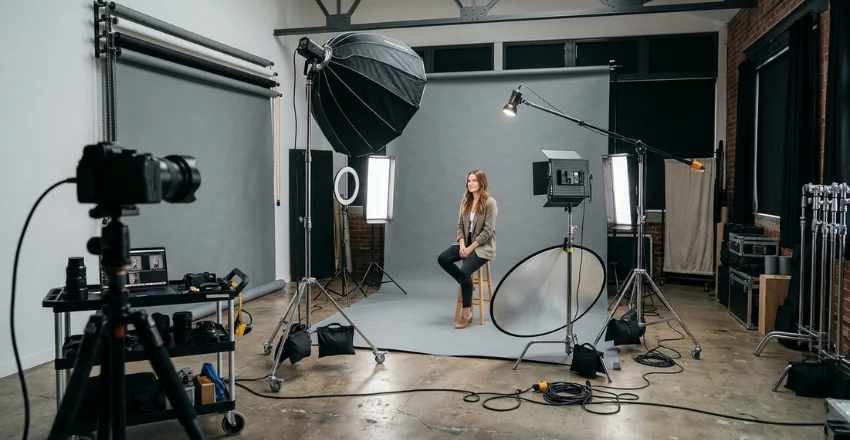
Start by deciding what must be illuminated. A seated presenter needs less coverage than a standing subject or group. Product tables also require different positioning than portrait sets.
Next, consider the distance between the light and your subject. Moving a source farther away usually reduces brightness and changes its apparent softness. Large rooms therefore demand more output.
Finally, plan around the modifier you expect to use. Diffusion absorbs some light, while larger modifiers spread output over a wider area. Buying output without considering modifiers can lead to disappointing results.
Key, Fill, and Back Light Setups
The key light is the main source shaping the subject. Place it slightly above eye level and off-axis for a natural starting point. Changing its angle often makes a larger difference than buying another light.
Fill light reduces shadows created by the key. A reflector can provide fill without requiring another powered fixture. This approach keeps a first setup inexpensive and easier to understand.
A back, rim, or hair light separates the subject from the background. Place it behind the subject and keep unwanted flare away from the lens. This third light should solve a specific separation problem rather than satisfy a checklist.
Beginners should learn one light before building a three-light arrangement. Add fill when shadows become too deep for your intended look. Add a back light when subject-background separation needs improvement.
CRI, TLCI, and Color Accuracy
CRI describes how faithfully a light renders colors compared with a reference source. TLCI evaluates color performance with television and camera systems in mind. Higher scores generally indicate more dependable color reproduction.
For serious photo or video work, look for published color-quality ratings from the manufacturer. Ratings around the mid-90s or higher are a useful buying target. Also compare real reviews when accurate skin tones or product colors are critical.
Do not judge quality from one rating alone. Output consistency, flicker behavior, cooling, and color shifts across dimming levels can also matter. Manufacturer documentation should clearly state the measurements it claims.
Color Temperature: Daylight vs Bi-Color
Color temperature is measured in kelvins. Lower values appear warmer, while higher values appear cooler. Many photography lights use a daylight-oriented setting near common daylight balance.
Fixed-color lights deliver output in one color-temperature range. That can be valuable when your shooting environment stays controlled. It also reduces the number of settings you must manage.
Bi-color fixtures let you move between warmer and cooler white light. This flexibility helps match lamps, windows, or other fixtures already present. The trade-off can include reduced maximum output at certain settings.
Set your camera white balance deliberately when color consistency matters. Avoid mixing several unrelated light colors unless that contrast serves the creative goal. Correcting inconsistent lighting later can consume unnecessary editing time.
Understanding Power and Output
Wattage tells you how much electrical power equipment uses. It does not directly describe how much useful light reaches your subject. Fixture design, beam angle, distance, and modifiers also affect practical output.
Continuous-light manufacturers may publish lux measurements at specific distances. Those figures become useful when competing products use the same testing conditions. Comparing numbers measured differently can produce misleading conclusions.
Flash equipment commonly uses watt-seconds to describe stored flash energy. That figure still doesn’t tell the full story about usable brightness. Reflectors, flash tubes, modifiers, and placement influence the final exposure.
Buy enough output for your real working distance and modifier. More power can provide useful headroom, but unused capacity has little value. Space, noise, mounting, and control features can matter just as much.
Studio Lighting Budget Tiers for US Buyers
Entry Level: About 80–250
This range can cover a basic ring light, small LED panel, or simple one-light kit. Some packages include a lightweight stand or basic modifier. Check exactly what the package contains before comparing prices.
Prioritize a stable stand, usable brightness, and a modifier that fits your room. A reflector can provide inexpensive fill without another powered light. Spend less on extra fixtures until you understand your first light.
Midrange: About 250–700
This range opens access to stronger continuous fixtures and more capable flash systems. Two-light packages also become more common. You may also find better controls, mounting options, and modifiers here.
Hybrid creators should still prioritize one strong key before several weaker fixtures. Photographers can consider a strobe plus a dependable modifier and trigger. Your final cost should include stands, bags, mounts, and replacement accessories.
Higher-End Home Studio: About 700–1,500+
This budget supports more powerful lights or a larger multi-light arrangement. Better support equipment and larger modifiers may consume a meaningful share. Portable battery systems can also raise costs considerably.
You do not need this tier for every professional-looking result. A carefully placed midrange fixture can outperform a poorly positioned expensive kit. Upgrade when a specific limitation appears in your current workflow.
US prices vary by retailer, bundle, and promotion. Current official and retail listings show creator lights ranging from inexpensive kits to several-hundred-dollar professional fixtures. Treat these tiers as planning ranges rather than quoted prices.
Home-Studio Tips That Save Money
Measure your shooting area before ordering stands or modifiers. A huge softbox may become awkward inside a small bedroom. Ceiling height matters whenever you want light above the subject.
Control window light before buying more output. Curtains, blinds, or shooting after sunset can reduce competition from ambient light. White walls can also create unwanted fill and reduce contrast.
Use sandbags or another suitable counterweight when stands become top-heavy. Keep cables outside walking paths whenever possible. Safety matters more than squeezing another fixture into a crowded room.
Creators recording audio should consider fan noise before buying powerful continuous fixtures. Room noise affects interviews and voice-led videos as much as picture quality. Quiet lighting can matter during interviews and voice-led videos.
Camera users should also check their recording media before longer sessions. Techriyon’s SD card guide explains capacity, speed classes, and video-oriented ratings. Better lighting can’t fix footage problems caused by unsuitable storage.
If your workflow includes generated backgrounds or visual concepts, review Techriyon’s AI image guide. Editors working away from a desktop can also compare hardware in the workstation laptop guide. Those choices sit downstream from capture quality but still affect production.
What to Check Before You Buy
Use a short checklist before ordering any fixture. This prevents a low headline price from hiding missing accessories. It also makes comparisons between brands more meaningful.
- Continuous LED or flash/strobe.
- Published CRI and TLCI information.
- Fixed or adjustable color temperature.
- Output measurements and testing distance.
- Modifier compatibility.
- Included stand or mounting hardware.
- AC, battery, or mixed power options.
- Fan noise for video work.
- Wireless, app, or remote controls.
- Replacement parts and accessories.
- US warranty and return support.
- Total system cost after modifiers and stands.
Brands such as Godox, Aputure, Elgato, and Neewer can provide useful reference points. Compare the current product page rather than assuming specifications from a brand name. Product families change, and specifications differ between models.
Frequently Asked Questions
How many studio lights do beginners need?
Most beginners should start with one main light. A reflector can soften the opposite side without adding setup complexity. Add another source only after identifying a problem the first light cannot solve.
Is continuous LED better than flash?
Neither type is universally better. Continuous LEDs suit video and provide immediate visual feedback. Flash generally offers stronger still-photography performance for motion and ambient-light control.
Are softboxes better than umbrellas?
Softboxes provide more directional control and limit spill more effectively. Umbrellas usually cost less and open faster. Your room size and desired look should guide the choice.
What CRI should a studio light have?
A higher CRI generally supports more accurate color reproduction. Ratings in the mid-90s or above are a sensible target for serious creator work. Check TLCI too when video is important.
Do I need a ring light for video?
No, a ring light is only one lighting style. It works well for compact, front-facing creator setups. An angled softbox usually gives you more control over facial shape and background separation.
Final Buying Recommendation
Start with the job rather than the brand. Video and hybrid creators should usually begin with one color-accurate continuous key light and a suitable modifier. Still photographers needing more output should consider flash or strobe first. Spend enough on safe support equipment and useful modifiers. A reflector often provides more value than an unnecessary second powered light. Upgrade only when your current setup cannot create the result you need.
Before ordering, measure your room and list your normal subjects. Then compare complete system costs, including stands, modifiers, mounts, and power options. That process will usually lead to a better purchase than choosing the highest specification on a product page.